Back in August a good friend told me about this Natural Brew Recipe. It sounded like pretty potent stuff! It's an Anti-Bacterial, Anti-Fungal AND Anti-Viral concoction. We made some up and the results have been short of miraculous. Anytime we feel something coming on, we take an eyedropper squirt. By morning, it's gone. A good friend had a serious sinus infection (she was so swollen from infection, she had black eyes). We gave her some and told her to take it every 15 min. She was infection clear within 2 days- whereas any other time she's been that sick, she's ended up in the hospital. We joke with her that the hospital bill would have been at least $20,000, so she can write us a check for $10,000- a savings of half, lol!!
Here's the recipe of this little concoction:
Equal parts of
Grated Horseradish root
Grated Ginger Root
(these 2 things really do need to be grated, everything else can be coarsely chopped in a food processor)
White onion- It needs to be white, they are hotter than the other onions
Habanero Peppers- I wouldn't do too much to them other than drop them in the food processor whole, you will be straining them later anyway. If you do want to cut them up, please be sure to use gloves.
Garlic
Put everything in a glass jar. Fill with Apple Cider Vinegar until covered by about 1 inch. Let it sit out on the countertop for 2-3 weeks, shaking up a couple of times per day. Strain. Use by the eyedropper full when you first feel something coming on.
Usually, if I'm going to feel sick, it's of an evening. I will take an eyedropper and feel fine by morning. This has really knocked out any sign of a sore throat, which for me, since I still have my tonsils, can get very serious very quickly. If you feel ill of a morning, depending on how sick you are, take about 3-5 times a day. My friend, who really was past all reasonable preventative care, took it every 15 min.
It surprisingly isn't as hot as you think it would be! However, we won't give it to our son, because it does have a serious kick. For him, we give him a variety of homeopathics for a cold (which is all he's had ever when he's been sick), use Badger's Winter Balm, and Grapefruit Seed Extract (natural anitbiotic/ 3-5 drops in a small glass of juice- we have Noni juice, but any juice would work- just make sure you dilute it)
Don't know what to get everyone for Christmas? You still have time to get a 2 week brew in!
Sunday, December 11, 2011

Saturday, December 3, 2011
Dye Playsilks with Kool-Aid

Dyeing them with Kool-Aid is simple. First, buy Kool-Aid in the colors you want. The above one is Berry Blue. You will need about 3-5 packets per scarf, depending on how dark you want the color and how big the scarf. If you have a super big scarf, you would need more dye. In a dish (I use a glass casserole dish), combine 2 Cups Vinegar with 2 Cups Hot water and the packets of Kool-Aid. I should mention that at this point you really should wear plastic gloves of some kind. The Kool-Aid will stain your hands. I'm typing this with blue fingers, lol!! Place the playsilk in the dish, swishing around to soak up the color. When you are happy with the color, wring out and then rinse in the sink with cold water- until the water runs clear. With the blue, I rinsed for a long time, it never ran clear, but it was definitely less that when I started, so I was happy. Hang to dry. It doesn't take very long for them to dry- probably less than an hour. Easy peasy :D
I order my playsilks through a cloth diaper co-op. We order the white/natural colored ones and I think they're from Sarah's Silks.

Thursday, December 1, 2011
Gift Bag

A friend of mine's little girl is turning 2. Here is what I've made for her:
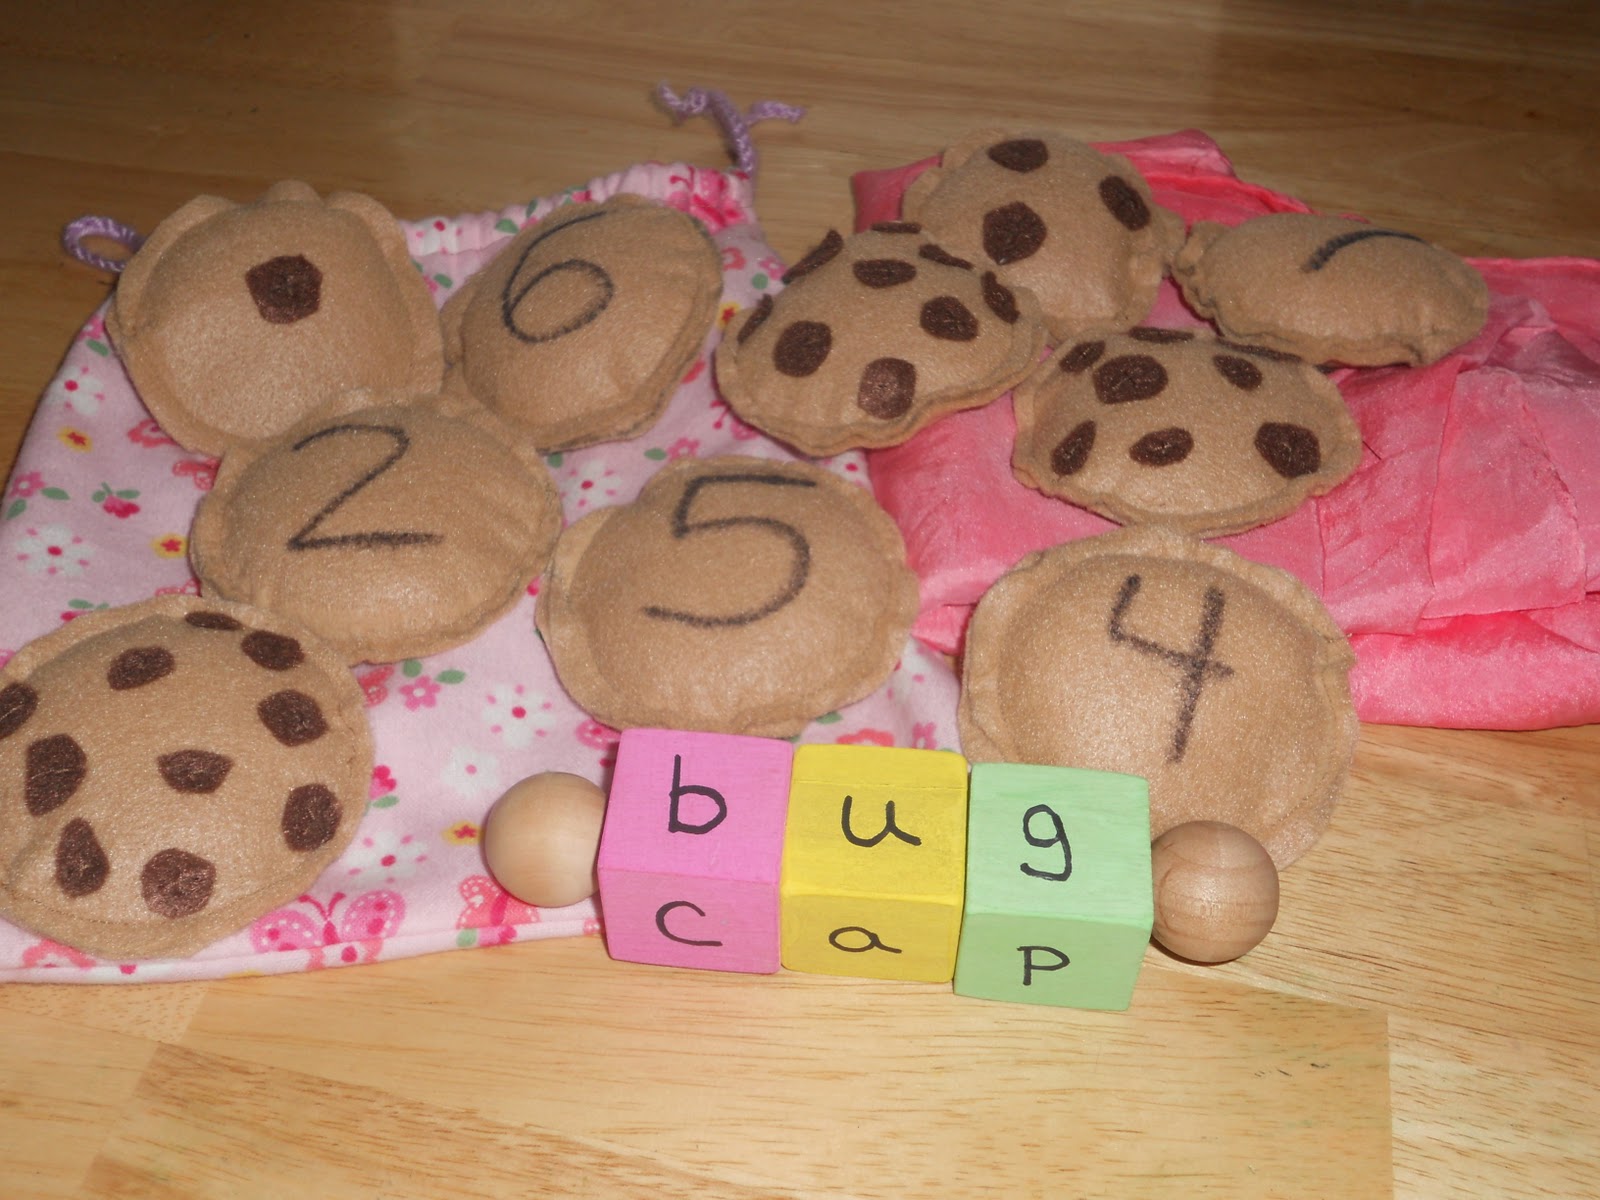
In addition to the bag, I made Counting Cookies, Spinning Speller, and dyed a playsilk for her. Eli is also getting Counting Cookies for Christmas and a Spinning Speller, and another dyed playsilk (he has several and loves them!).
The Counting Cookies are made from felt.
Here are directions from Counting Coconuts for the Spinning Speller
My first row letters: b, c, h, m
My second row: a, i, o, u
My third row: d, g, p, t
I colored the blocks using watercolors from an artist kit I got from Hobby Lobby- it has markers, colored pencils, crayons, watercolors, etc. in it.
Here are the directions to use Kool-Aid to dye playsilks.
I bought the silks from a cloth diapering co-op group I'm in. They are Sarah's Silks.
All together, I think I spent about $10 for everything- we did have some things, like the dowel rod for the speller and I had the fabric (some even given to me!). Buying it retail would have cost me about $50.
Our December Learning
I’ve been getting Eli’s December activities ready all this weekend. We are following Montessori style learning. Here’s what’s on our shelves for December to pick from each day.
Christmas Sensory Bin: Red/white colored rice, 2 boxes, sparkly poms, a pine cone, jingle bells, mini presents, holiday ornaments, bows, trees, some garland cut into smaller pieces, metal scoop, and yellow cup.

Language: Beginning Word Sounds- I’m waiting until January to officially start him in the Montessori Pink series, but will use these for December since he knows his alphabet and the sounds each letter makes. I don’t know how he knows this, other than from watching PBS because I didn’t drill him on it! Definitely want to keep that momentum going!!

Sorting: This activity came from Counting Coconuts. She also has a free download for the Nuts Nomenclature cards.

Science: Continuing with the Frog activities- matching and sequencing, as well as adding the Amphibian 3 pt. cards. These were from Montessori Print Shop. I also found some free materials from the MO Conservation Dept. about Frogs and Toads.


Tree Peg Board: I bought this at the Dollar Tree store. It will be used for fine motor skills, counting, addition/subtraction, and sequencing.

Christmas Activities: 3 pt Cards, 12 Days of Christmas counting cards, and Sorting Presents. I made these and as soon as I can figure out how to post them here, I will. If you really want them, I don’t mind emailing them, unless I get over-run with emails, lol!! Just email me sherri@liveyourintentions.net.

Silver and Gold: these are new colors for Eli, so I have Silver and Gold Jingle Bells and Presents. I made sequencing/matching cards for him. Also, insert Burl Ives singing Silver and Gold, you know, from Rudolph the Red Nosed Reindeer

Arts and Crafts: Holiday Stamps from Hobby Lobby

Practical Life: Folding washcloths. I bought these from Wal-Mart, then with a straight edge and Sharpie, marked where Eli needs to fold the washcloth. There are several for him to do.

More Practical Life: I bought this little dish from Goodwill and it’s the perfect size to use for spoon/tong activities. Here, I have green/yellow flat glass beads for him to spoon. I also have holiday cutting stripes.
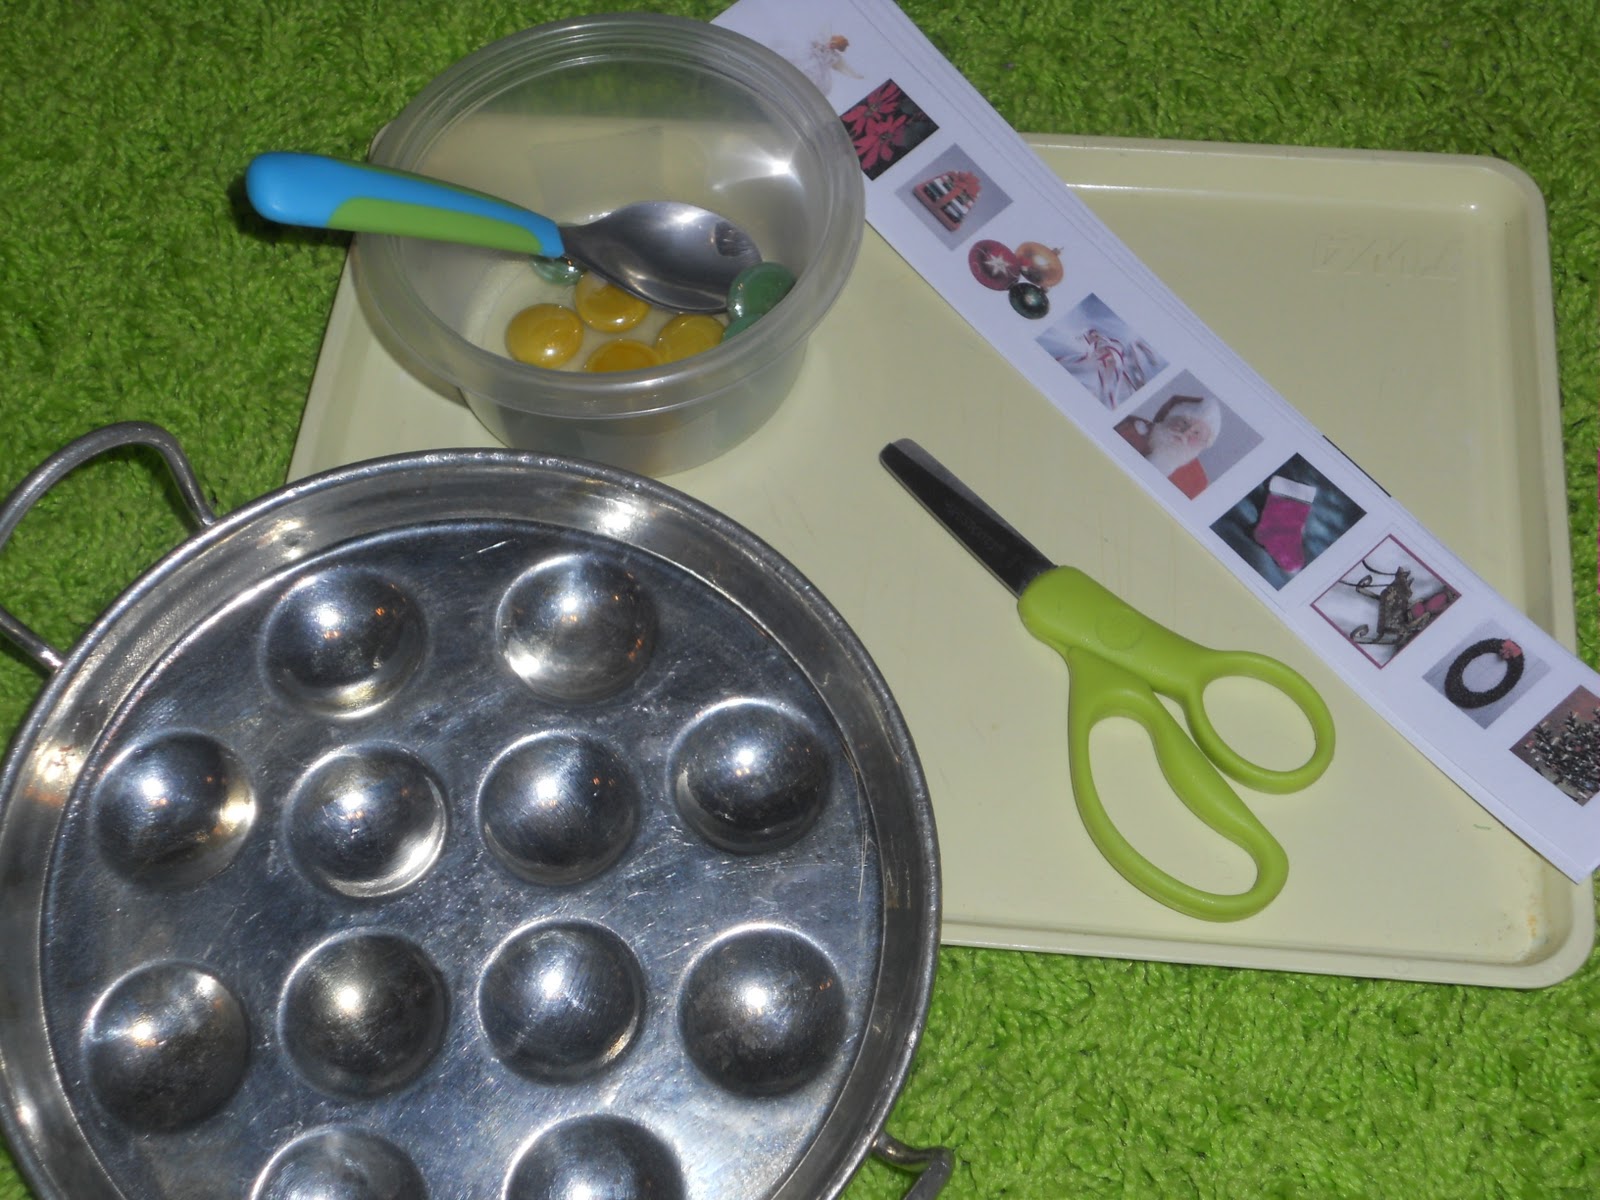
More Practical Life: I bought the holiday erasers from the Dollar Tree. For lacing, Eli will lace beads onto the sparkly pipe cleaner. I’m searching for red, white, green Tri-Beads for him to make candy cane and wreath ornaments.

Discovery Tray: I got this idea from Counting Coconuts. Eli LOVES his magnifying glass! In the basket- cedar branch, pine cone, mixed nuts, cinnamon sticks, piece of Pompas Grass.

Geometry: Once again, from Counting Coconuts. I had the colored straws, so I cut them into smaller pieces. The control of error is that they are color coded with the correct number for each of the shapes.

Geography: Land Forms booklet from Montessori Print Shop. We will be “making” these land forms using green rice and for the water, blue construction paper I’ve laminated (with clear kitchen contact paper), all within a plastic bin. We did this today, and I used Eli's green play dough for the land. It worked well.

Button Tree: For some reason, I can get this to rotate. Felt Button Tree that I made this afternoon.

Christmas Felt Board: I had everything to make a felt board for Eli, and then when I saw this activity from Counting Coconuts, I knew the time had come for me to make the board! I have ideas for several more felt boards for the upcoming months!

Not shown: Green Homemade playdough with beads for Christmas tree making
Salt Dough Ornaments
Cooking- Eli loves to help me with baking! We will be making these Animal Crackers from Weelicious. We will also be making Christmas Sugar Cookies for Santa.
Natural Parenting
Original post- Feb. 19, 2011
So what is this “natural family living” thing? For us, it’s a mix of attachment parenting, urban homesteading, and living a simpler life. I recently came across the term “natural family living” in an article at mothering.com by Peggy O’Mara. She listed some of the basic ideas for this lifestyle which include, but aren’t limited to:
~Pregnancy and birth are normal processes that do not require drugs or interventions.
~Breastmilk is the optimum food for humans.
~Co-sleeping helps to facilitate successful breastfeeding and bonding.
~Mothers and babies need to be together, especially during the first three to five years of life
~Human babies have a need to be touched and to be held in arms.
~It is important to cultivate a community of like-minded families for friendship, information, and support.
~Eat food that is in as natural a state as possible.
~The human body has the capacity to fight off illness without the use of drugs and interventions.
~Unstructured play is essential to the full development of the human imagination.
~Hitting and punishment are unnecessary when children’s natural desire to cooperate is engaged to resolve conflicts.
As I read this list, my heart soared! It’s felt so good to be validated for my innate knowingness, even though what I knew to be true usually is in direct conflict with the mainstream. I find most mainstream parenting to be very detached and cruel. There, I said it, CRUEL! For example, letting a baby cry doesn’t teach them to sleep, it teaches them to give up because no one is coming to get them. Absolutely NOT something I want Eli to EVER learn! My goal for this blog is to help educate about a non-mainstream way of life while also providing links to experts and other articles. It isn’t just about natural parenting, but natural living.
Our Gardens

I’ve had lots of questions from people about our gardens. First, we are not master gardeners. Second, I am more than happy to share what limited knowledge I have and Third, our garden is a work in progress, trial and error, hoping to do things better each year!
About our garden…
Design
We have raised beds- one done one year and then we added the second one the following year. 2 “L” shaped, one “L” flipped so there is a square w/ 2 openings at the top and bottom. Each “L” is 2 cinder blocks high and are approximately 4′x16′, and 4′x8′. They are 16′ long so we can use cattle panels, they are 4′ wide so we don’t have to step into the garden. They are 2 blocks high so we can plant root veggies. We have taken cattle panels and made arbors at both openings to help maximize the space, where we grew peas and then green beans, and birdhouse gourds which took over where the peas were. We also have a smaller, 1 block high strawberry bed and herb garden.
We have raised beds- one done one year and then we added the second one the following year. 2 “L” shaped, one “L” flipped so there is a square w/ 2 openings at the top and bottom. Each “L” is 2 cinder blocks high and are approximately 4′x16′, and 4′x8′. They are 16′ long so we can use cattle panels, they are 4′ wide so we don’t have to step into the garden. They are 2 blocks high so we can plant root veggies. We have taken cattle panels and made arbors at both openings to help maximize the space, where we grew peas and then green beans, and birdhouse gourds which took over where the peas were. We also have a smaller, 1 block high strawberry bed and herb garden.


Filling the beds: Bottom layer is dirt. Then a layer of compost and then bags of Hummert Grow Mix and Manure. We did the bottom half in just plain dirt b/c it gets expensive when filling the beds. If you don’t want to plant root veggies, you can get by with 1 block high and it would save on $$, or just do a portion of the garden 2 blocks high. Milo helped fill the gardens too.

The design and fill ideas came from www.gardeningrevolution.com. Len Pense created this raised bed gardening concept. However, he doesn’t use any dirt. We only used dirt in the bottom to save $$. You can purchase his e-book, which now comes with DVD’s. He also offers classes throughout the year in Strafford, MO.


Square Foot Gardening
The really big thing we discovered was incorporating square foot gardening grids to maximize our garden space. I have a friend who has a small garden space, but he gets LOTS of produce by using this method. This method was developed by Mel Bartholomew and his website is www.squarefootgardening.com.
The really big thing we discovered was incorporating square foot gardening grids to maximize our garden space. I have a friend who has a small garden space, but he gets LOTS of produce by using this method. This method was developed by Mel Bartholomew and his website is www.squarefootgardening.com.
Pest control/Companion Planting
I planted marigolds in my garden, but I can see I need either more marigolds or just more/different plants. This is called companion planting. Attract the good bugs, detract the bad bugs. I don’t know much about it, but I did get a great book “Great Garden Companions” by Sally Jean Cunningham.
I planted marigolds in my garden, but I can see I need either more marigolds or just more/different plants. This is called companion planting. Attract the good bugs, detract the bad bugs. I don’t know much about it, but I did get a great book “Great Garden Companions” by Sally Jean Cunningham.
Soaker Hoses- this gets the water directly into the ground, not just randomly watering everything as we were doing with a sprinkler. I was surprised as how well they worked! However, the summer of 2011 was horribly hot- weeks on end of 100+ degree weather :( Here's to hoping for a better 2012 garden season!!
Why?
Original Post March 8, 2011
My husband and I have had a lot of discussions about why we’re developing out little homestead. It would be A LOT easier to just go to the grocery store. We wouldn’t have the responsibility of the chickens. We wouldn’t have all of the work of the garden. It would be easier to leave for an overnight trip without having to get a “farm sitter”. So why all of the trouble and fuss?
Because we can, and we should. There’s a lot of talk about the economy, food sources, and prices. We want to be very careful about just how far we travel down the doomsday road. We don’t want to be doing all of this out of fear, and we don’t want to pass that fear along to our son. Even as my grandparents would talk about the Great Depression, they were able to do it without instilling fear. They didn’t have much to begin with, so they weren’t affected too much by the Depression. The one big difference in how they experienced the Depression, since they were farmers, is that they never had to stand in a soup kitchen line. These stories made a lasting impression on me. They didn’t depend on someone else to do for them what they could do for themselves. In the face of hard times, what we want to pass along to our son is a responsibility for the Earth, a connection to food and the knowledge of how to feed oneself good, homegrown food. We do have an emergency plan in place, but it isn’t our focus. Our focus is, however, the joy of backyard chickens, planning/planting a garden and flowers, cooking meals together, as a family and enjoying those wonderful meals. We are continually discussing plans for what to add to our little homestead next. We are very aware of what we are modeling and teaching our son, what we are passing along to him. Our hope is that we teach him respect, responsibility, awareness and joy for where his food comes from.
We are fortunate that we have 2 acres, even though only about half of that is usable, but it’s still more than what many have. Not everyone has access to land and growing their own. Everything we do here, takes away that much dependence on commercial food production. If everyone, who had access would use it, how would that change our commercial food production? If commercial producers weren’t so stressed to feed everyone, would they be able to incorporate better methods? Would they, even if they could? I would like to think they would. I feel, that as consumers, we have a responsibility in what and how we buy. If you have land, try growing something! Even when I rented a home in Springfield, I tried a small garden, but there was just too much shade. I had one spot with enough sun for a container in which I planted a cherry tomato plant. I did what I could do. Now that I have more, I can do more.
What can you do? Maybe you don’t want to raise chickens and that’s okay. Maybe you don’t want a big garden and that’s okay too. If you don’t want to, or simply can’t, grow and raise your own, find a small local farmer, join a CSA (community supported agriculture), go to the farmer’s markets, and get to know the people growing your food. Every step counts.
Subscribe to:
Posts (Atom)